How To Run a Node API on a Digital Ocean Droplet
Complete guide to hosting a Node API on Digital Ocean using PM2, Nginx reverse proxy & SSL
The Brief
I was creating a multiplayer, browser based minefield-esque game, where users take turns guessing where a programmatically placed dot has rendered on a canvas. With this project, I wanted to try something different. Instead of using a framework to do my bidding, I wanted to rent a server that I could host my back and frontend on.
This was my basic setup process:
- Rent a Linux server.
- Install Node JS and npm.
- Upload my application code to this server.
- Configure a process manager, like PM2, to keep my code running.
- Set up a reverse proxy (Nginx) to handles requests and forwards them to a locally running, managed (see above), server.
- Configure a firewall (UFW on Ubuntu) to restrict access to necessary ports (e.g., 80 for HTTP, 443 for HTTPS, and my SSH port).
And, this is the technology stack I went with:
// The core stack.- API: Node JS (Express).- Web: TypeScript, Vite, React.- PM2 for process management.- Nginx for handling SSL, reverse proxying, and load balancing (VPS only).Implementation
1. Create Digital Ocean Droplet
This is pretty straight forward. Because I do not expect much traffic, much load, I went for the cheapest possible plan. I found Deploy your NodeJS application to a Digital Ocean Droplet || Step by Step Guide to be a really helpful tutorial.
One point worth making is that you will need to SSH onto the droplet. This is a helpful tutorial to generate the keys. How to Create SSH Keys with OpenSSH on MacOS or Linux. This means you need an SSH key. For me, because my keys were generated in an unexpected place on my machine, I needed to specify the path of the private key.
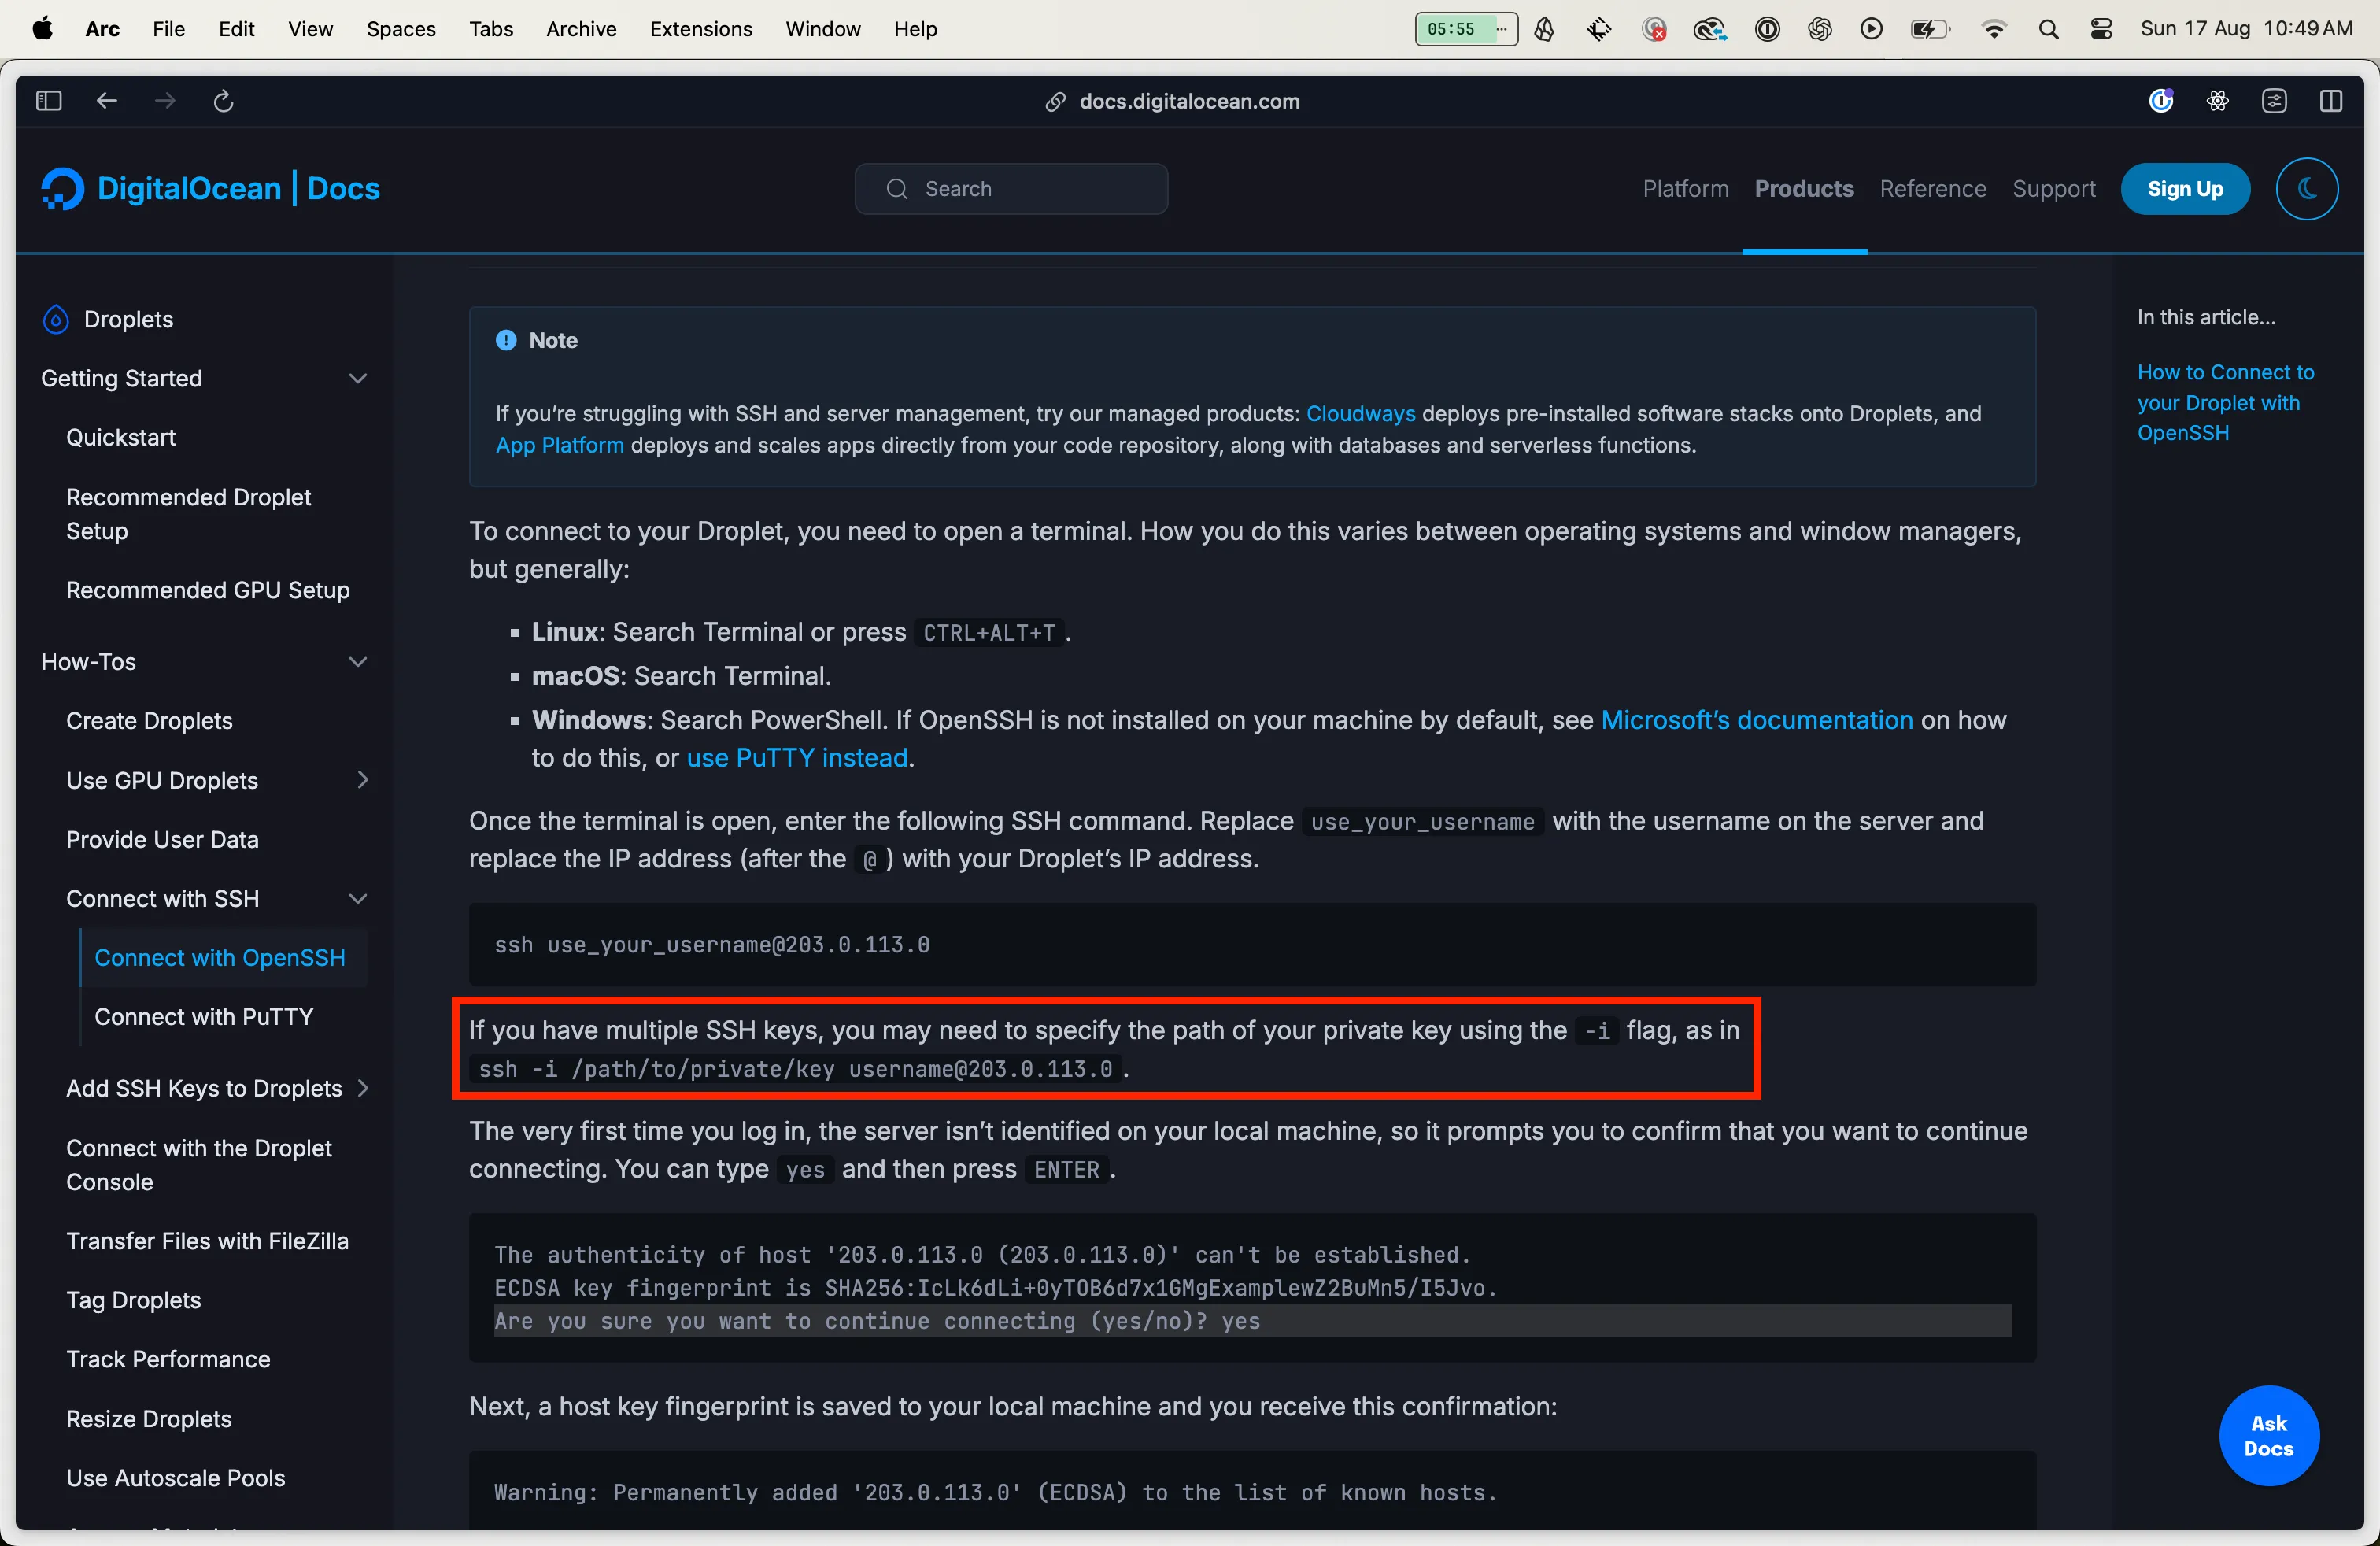
So, to get “on the box”, I ran the command below. Notice the strange address on my machine for the SSH private key. 170.64.232.53 is the IP address I got from my DO droplet.
ssh -i /Users/jackwilliammorris/where-the-dot root@170.64.232.532. Create Non Root User
The root user is the administrative user in a Linux environment that has very broad privileges. Because of the heightened privileges of the root account, you are discouraged from using it on a regular basis. This is because the root account is able to make very destructive changes, even by accident.
The next step is setting up a new user account with reduced privileges for day-to-day use. Later, we’ll show you how to temporarily gain increased privileges for the times when you need them.
I just followed that tutorial to the book. Importantly, because I was accessing the droplet with my root account through SSH, I had to copy my public key over to my non root users authorized_keys file. The steps for this are in If the root Account Uses SSH Key Authentication.
3. Setup Firewall
I did this using ufw on Ubuntu. I followed the steps in Setting Up A Basic Firewall to ensure the firewall allowed SSH type connections.
4. Install Node
Install nvm:
curl -o- https://raw.githubusercontent.com/nvm-sh/nvm/v0.40.3/install.sh | bashLoad the nvm scripts as part of session:
export NVM_DIR="$HOME/.nvm"[ -s "$NVM_DIR/nvm.sh" ] && \. "$NVM_DIR/nvm.sh" # This loads nvm[ -s "$NVM_DIR/bash_completion" ] && \. "$NVM_DIR/bash_completion" # This loads nvm bash_completion5. Clone Github Repository
In order to do this, I needed to generate an SSH key and add the public key to my Github repository. I followed the steps outlined in Step 4 :- Clone your private repository from GitHub to Server. I named the public key where-the-dot-server-deploy-key because I needed to distinguish between it and another SSH key that I would later use to access the Github repository of my client code.
I made sure that my .ssh config looked like this:
Host github.com-where-the-dot-server Hostname github.com AddKeysToAgent yes IdentityFile ~/.ssh/where-the-dot-server-deploy-key6. Install PM2
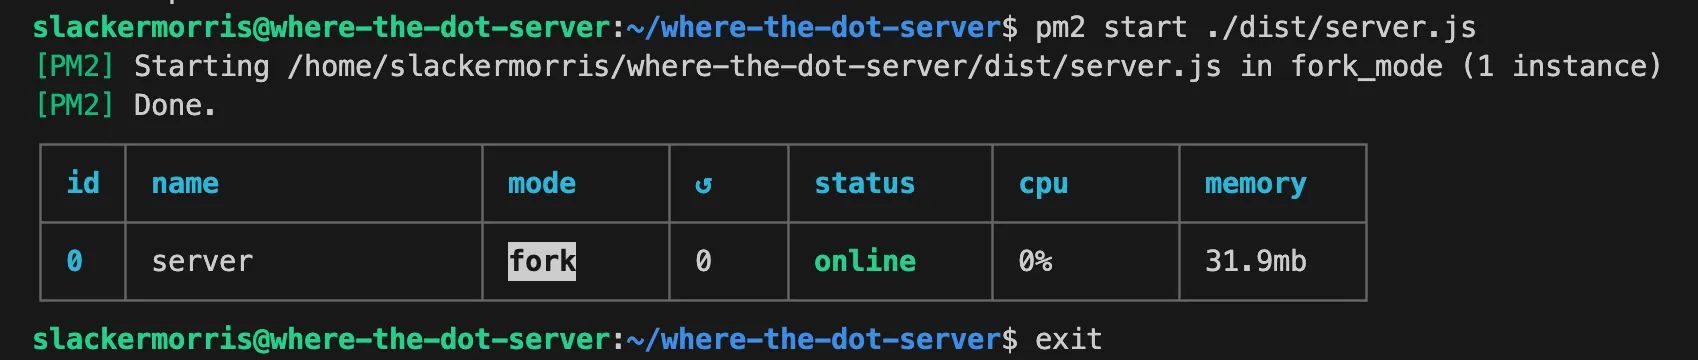
After cloning my project, I was able to run the Node server locally. I confirmed that the server was running by making a curl request against it when SSH’d onto the same droplet in another terminal.
However, once I exited my session, the server would stop running. In order to keep it persistent I needed to install PM2. PM2 is a process manager that makes it possible to daemonize applications so that they will run in the background as a service.
I followed the steps outlined in How To Set Up a Node.js Application for Production on Ubuntu 20.04.
The only difficulty I had in this space was that I was using TypeScript. PM2 does provide its own transpilers, but it issues fair warning that using them in production is not recommended. In the end, I used TypeScript as my transpiler. I then had PM2 run the output of the tsc build.
Because I was in this space, I was curious what the minimal setup would be to get automatic application restart with TypeScript. I’ve written down my findings in [[Best Development Experience For TypeScript Projects]].
7. Point DNS Records to Droplet
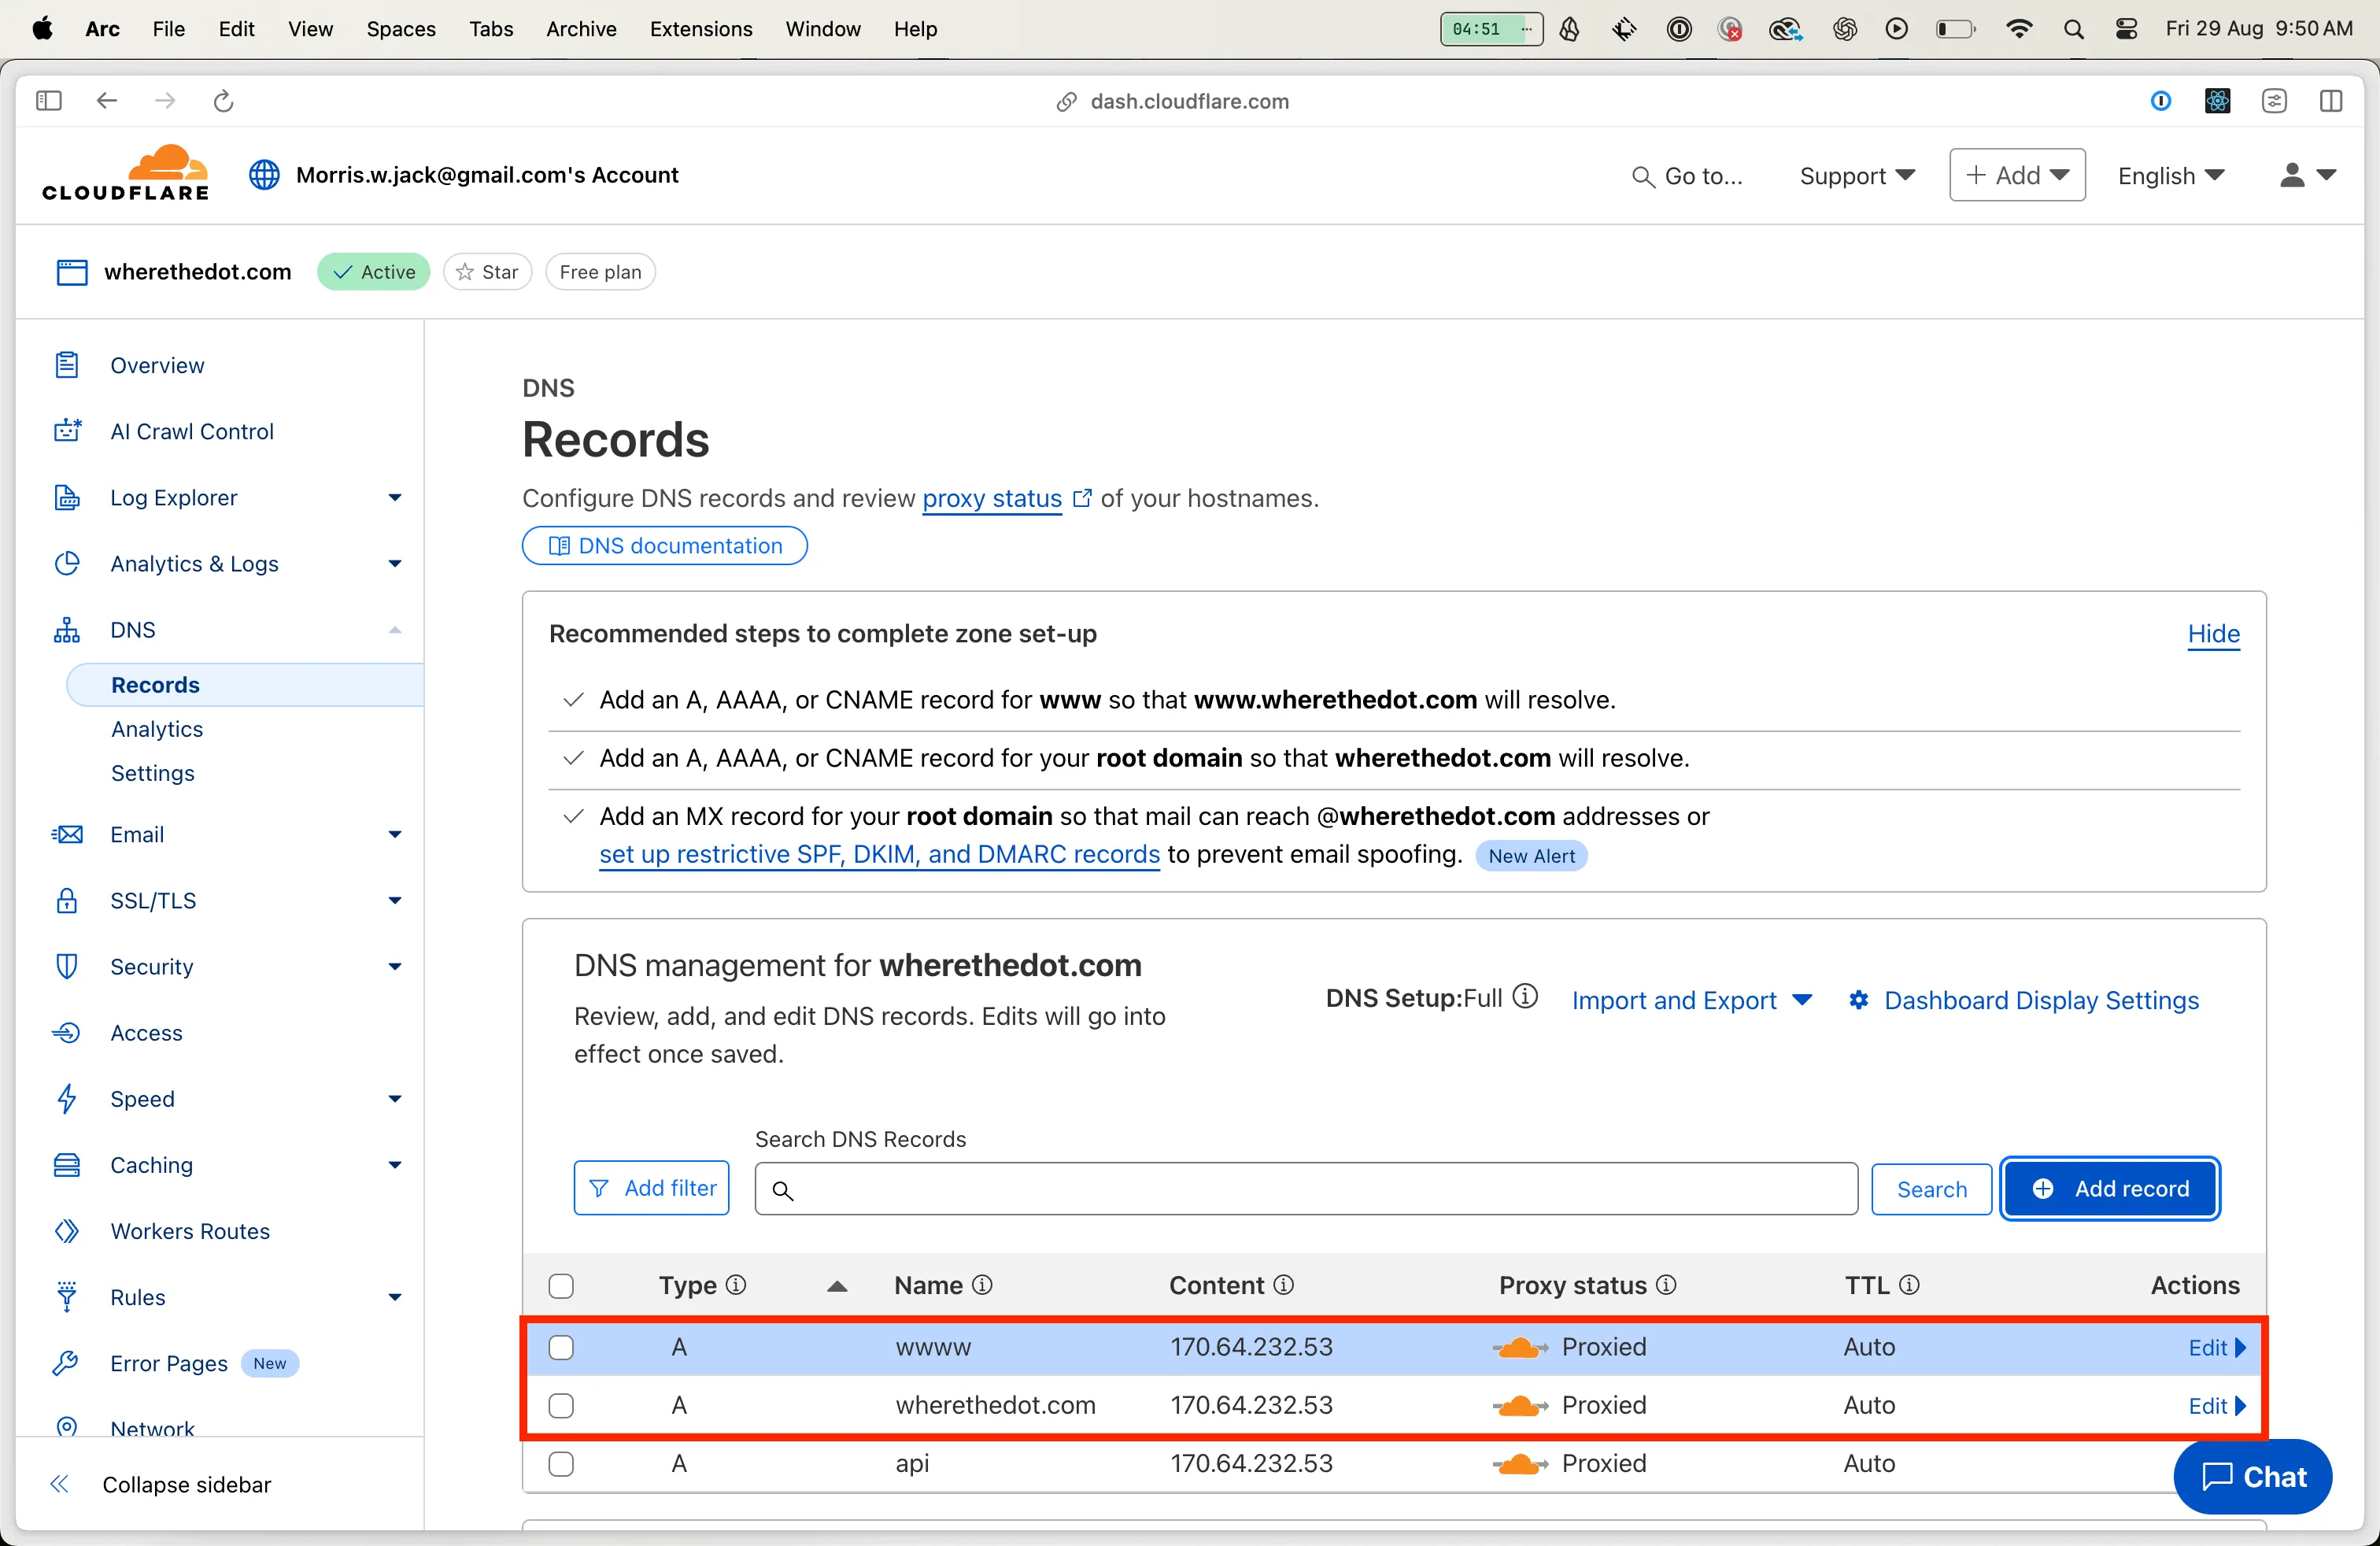
I chose to use Cloudflare as my DNS manager. I bought a domain off it. I did this before knowing that you cannot delegate the domain to use Digital Ocean name servers.
I needed to create three A Name records to point to the Digital Ocean droplet:
- One for the root domain
wherethedot.com. - One for a subdomain
www. - One for a subdomain
api.
8. Setting Nginx as a Reverse Proxy Server
Nginx as a reverse proxy routes traffic from a registered domain, in my case wherethedot.com, to the IP address of my droplet, to the locally running port :4000. We make a request for the domain. Cloudflare takes that request and forwards it to this IP address managed by DigitalOcean. The droplet is running an Nginx web server and this takes the request and proxies it through to the running server at localhost:4000. I found Deploy Nodejs App to DigitalOcean in 10 Minutes to be a helpful resource as it allowed me to realise that I needed Nginx as a reverse proxy whether I was writing a NodeJS server rendered web application or an API. In my case, it was an API.
I followed the steps outlined in How to Install and Configure Nginx on Ubuntu | Step-by-Step Guide. Specifically:
- Installed Nginx.
- Adjusted Firewall (
ufw) to allow access to Nginx service. - Visited Droplet IP address and confirmed I got the Nginx splash page: confirming that the Nginx server was running.
- Set up SSL/TLS with Cloudflare.
- Created server block so Nginx could act as a reverse proxy.
In setting up SSL/TLS with Cloudflare I needed to generate an Origin Certificate on Cloudflare and save the certificate and private key on my droplet. The steps for this are outlined in Setting Up Cloudflare with DigitalOcean: A Step-by-Step Guide (2024). Be sure to set the right permissions.
sudo mkdir -p /etc/ssl/certssudo mkdir -p /etc/ssl/private
sudo nano /etc/ssl/certs/cloudflare_origin_cert.pem# Paste the certificate content and save the file.
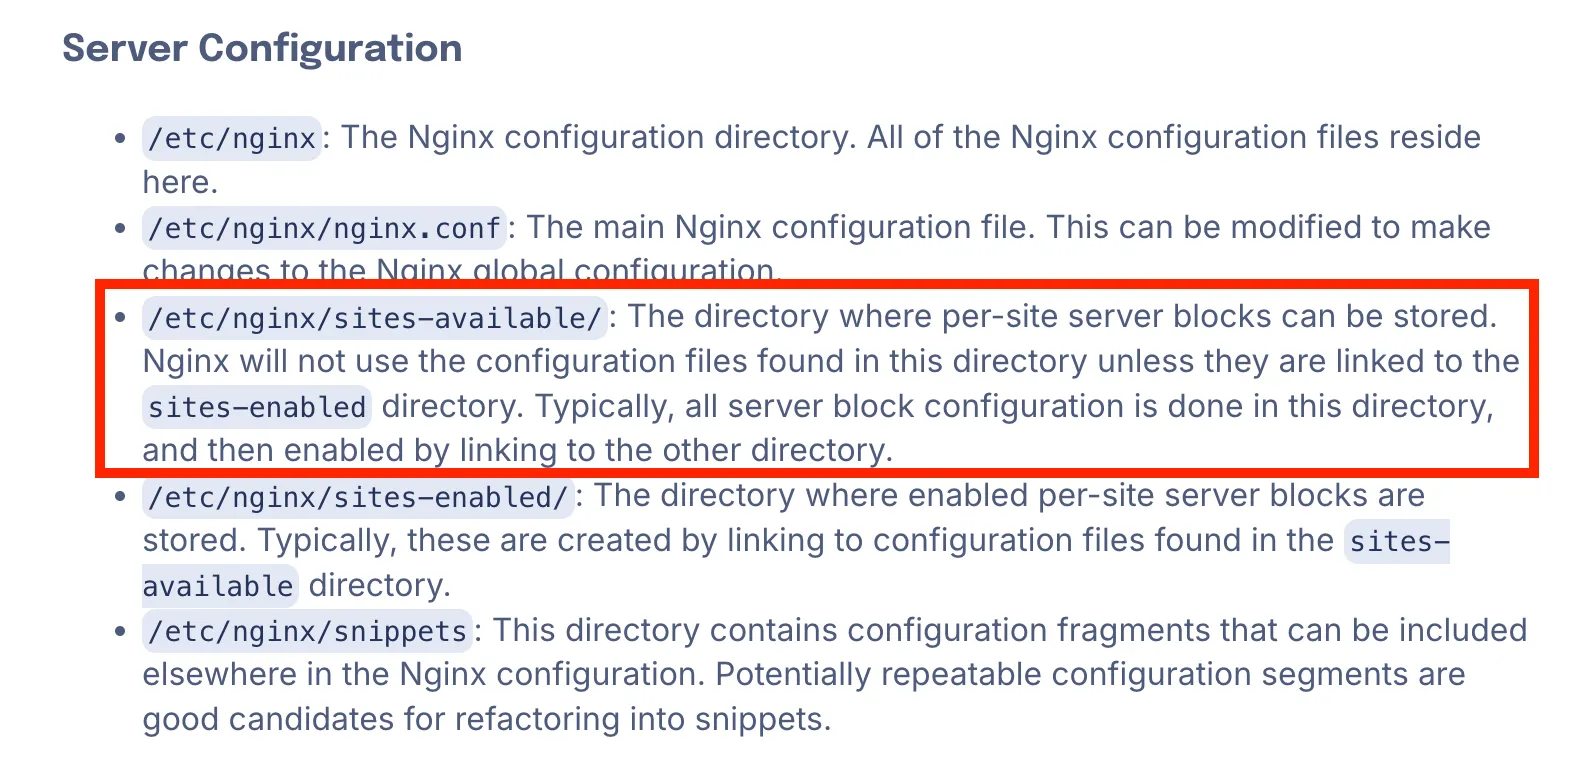
sudo nano /etc/ssl/private/cloudflare_origin_key.pem# Paste the private key content and save the file.When I came to setting up server blocks I took a little different of an approach. Because I was implementing a Node API, I did not need to create a custom page for Nginx to serve. I therefore did not perform the steps touching the /var/www/html directory. I did however create a server block with the expected directives.
sudo nano /etc/nginx/sites-available/wherethedot.comWhere wherethedot.com was the domain I had registered with Cloudflare.
Below is my final Nginx configuration file. I stitched this together between what I found in Setting Up Cloudflare with DigitalOcean: A Step-by-Step Guide (2024) and How to Install and Configure Nginx on Ubuntu | Step-by-Step Guide. You will notice that there is some Websockets configuration included. It isn’t something I am making use of now, but I do intend to. It is also worth pointing out that it configures Nginx to use the Origin Certificate we generated and installed.
# HTTP to HTTPS redirect for API subdomainserver { listen 80; server_name api.wherethedot.com; return 301 https://$host$request_uri;}
# API subdomain - Node.js APIserver { listen 443 ssl;
server_name api.wherethedot.com;
ssl_certificate /etc/ssl/certs/cloudflare_origin_cert.pem; ssl_certificate_key /etc/ssl/private/cloudflare_origin_key.pem;
ssl_protocols TLSv1.2 TLSv1.3; ssl_ciphers HIGH:!aNULL:!MD5;
# Proxy all requests to Node.js API location / { proxy_pass http://127.0.0.1:4000; proxy_http_version 1.1; proxy_set_header Upgrade $http_upgrade; proxy_set_header Connection "upgrade"; proxy_set_header Host $host; proxy_set_header X-Real-IP $remote_addr; proxy_set_header X-Forwarded-For $proxy_add_x_forwarded_for; proxy_set_header X-Forwarded-Proto $scheme; }
# WebSocket support (if needed) location /ws/ { proxy_pass http://127.0.0.1:4000; proxy_http_version 1.1; proxy_set_header Upgrade $http_upgrade; proxy_set_header Connection "upgrade"; proxy_set_header Host $host; proxy_set_header X-Real-IP $remote_addr; proxy_set_header X-Forwarded-For $proxy_add_x_forwarded_for; proxy_set_header X-Forwarded-Proto $scheme; }}There was an additional symlinking step that I ended up doing. I did it before I realised that I did not need to create my own custom page for Nginx to serve. But, as per the documentation below, I don’t know whether I still needed to do it to make sure the server block I did create was actually picked up. This is the symlink command I ran:
sudo ln -s /etc/nginx/sites-available/wherethedot.com /etc/nginx/sites-enabled/So, potentially, if you get stuck, and things aren’t working, this could be the ticket out.
I found How to Install and Configure Nginx on Ubuntu | Step-by-Step Guide very helpful.
I then made sure there were no syntax errors in my Nginx files:
sudo nginx -tAnd restarted the Nginx server:
sudo systemctl restart nginxI then visited the domain www.wherethedot.com and confirmed I got a web page with expected content. I do still think it is using the default web page.
References
- How to point GoDaddy Domains to DigitalOcean with Cloudflare A little bit different of an approach, but some of the details helped me form an understanding of what I needed to do.
- Using a load balancer with digital ocean droplets that points to a cloudflare dns Some of the steps here were useful to help me understand the process as a whole.